Lessons in Fitting

sweater_flat_lay_2

This is the slightly painful story of the time I tried to knit a sweater for B for Christmas in a few months, in secret… I learned my lesson, don’t try to knit well fitting garments in secret! The pattern is Goat Herder Pullover by Ann Budd. I bought the yarn and the pattern rather impulsively one Saturday in late October. I cast on a few weeks after that and soon realized I didn’t like the pattern that much! All of a sudden the beautiful chevron pattern around the chest started to look rather Charlie Brown-esque. Thankfully when I was browsing Ravelry I came across the Jasmine Scarf by Purl Soho. And that is where the idea for this pullover was born… and then things started to go south…

I originally wanted to have five of the caliper cables across the chest, forming a V on the front and back of the sweater. It soon became apparent that I wasn’t going to have enough stitches in the chest to do the fourth and fifth cables, so I had to leave them out. I think this really diminished the beauty of the design I was going for. The three cables have a narrow, lanky appearance. The full five cables would have formed a larger V shape across the chest, accenting the width of the chest. Unfortunately this wasn’t going to be my biggest issue…

Despite the many measurements I took, this sweater was a fit DISASTER:

  • It was too short
  • It was much too large at the bottom
  • It was much too small in the chest
  • It was too narrow in the shoulders
  • The arm holes were too small

sweater_front

When I added the cables, I forgot to take into account how they would affect the resulting fabric. They caused the chest area to be much tighter than the bottom. The bottom was too large, but that was mostly my fault. I knew the sweater had no shaping, and I based my size selection off of the chest measurement I took. However B has a large taper from chest to waist (almost a 6″ difference) and this combined with the tight gauge of the sweater caused the sweater to stick out in an unsightly manner.

I decided there was no saving the sweater and that it had to go back to the drawing board. I frogged it all.

I will be attempting it again.

But this time not in secret, and not as written. I’ll have to make modifications to get that perfect fit!

The Couture Dress: Lessons 2 & 3

couturedress2

Phew. I’m back with the next installment of the couture dress! I know it’s been a while, but I’ve only been managing around 30 minutes of sewing time about 3 days a week! I think I’ve done pretty well within those time constraints, if I do say so myself! I divided this post into two parts, Lesson 2 and Lesson 3 of the course. Lesson 1 was the introduction, so there wasn’t any work to be done there!

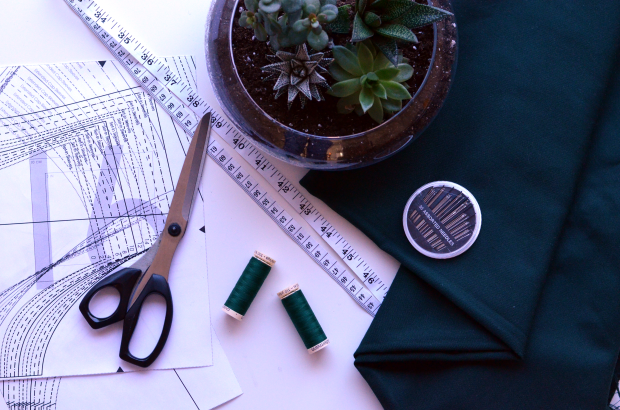
Lesson 2 – Muslin 1: Pin and Cut
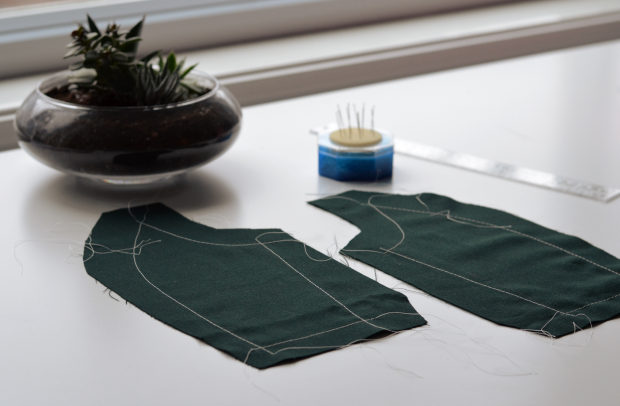
Sounds easy enough right? Well, not quite… I had to straighten the grain and I’d only ever straightened the grain of fabric which I could tear or pull a thread out! With this fabric, the thread would break about 1 or 2 inches in. Eventually I figured out that I could cut along the line left by the thread, pull another thread, cut along the line left by that thread, and so on. Afterwards I pinned the selvages together using a lot of pins! One thing I didn’t do is clip int the selvages, I forgot to do that but they didn’t look like they were pulling too tight!

Afterwards I traced 5/8 of an inch from the cutting line on each pattern piece. This took FOREVER! I decided to use this time to listen to Spanish language documentaries to hopefully improve my Spanish skills (I’m not sure this worked)… And finally I pinned the pieces to the fabric, measuring the grainlines from the selvages carefully for each piece and cut them out!

And unfortunately (or fortunately?) I actually learned a lot from lesson 2… I thought I should add a little “lessons learned” section so you can learn from my mistakes and as reference for myself. So here you are, here are the lessons learned from Lesson 2 of the Couture Dress class!

Lessons learned:

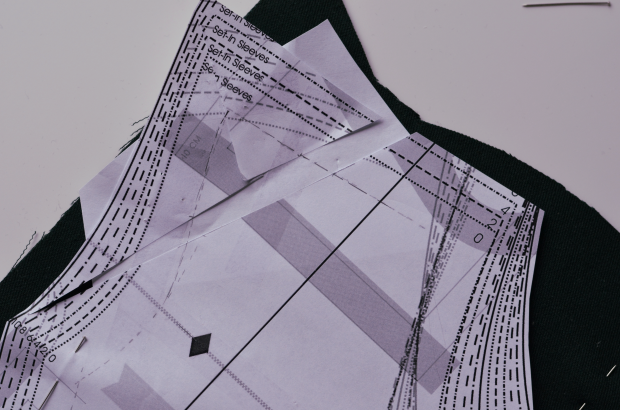
  1. Trace your pattern to actual tracing paper or swedish tracing paper: printer paper is too thick to pin accurately to the fabric
  2. Clip your selvages
  3. Measure your body carefully (waist, bust, hips, neck-to-waist, waist-to-hips, bicep circumference, shoulder-to-shoulder…) and compare to the pattern stitching lines: make any adjustments based on this

As you can maybe tell from #3, I made some adjustments to this dress even before finishing the muslin. I have wide shoulders. I’ve also been working out a lot more in the last few years. I used to fit (tightly) in the shoulders of commercial ready to wear clothes, but in the last few months I’ve noticed the correct bust/waist size is very, very small in the shoulders… To the point of bursting seams! I measured myself to be about 14 inches shoulder to shoulder (more accurately shoulder seam to shoulder seam), the pattern was only 13 inches, so I added 1/2 inch to each side (front and back) using this tutorial.

couturedressshoulder

Lesson 3 – Muslin 2: Assembly

Alright I will confess right now: I deviated from the instructions. I used chalk paper instead of wax paper. I know, Susan Khalje specifically says not to use chalk paper. But I spent a long time reading up on wax paper online and most people seemed to say it was not worth using because it was seldom completely removable from fabric. I decided even though my primary goal is to make beautiful, elegant clothes for myself I still want these clothes to be easy to take care of. This means I won’t be using silk organza interlining (unless I’m making a wedding dress!), my wax marks would go directly on my fashion fabrics and could potentially show through at some point. I didn’t want to get used to using wax paper if I wasn’t going to be able to use it on most of my projects. Also it was expensive (bad Canadian dollar is not doing us any favors)!

chalkpaper

I quickly learned that lesson learned #1 (trace your pattern to actual tracing paper) is important for another reason: printer paper is too thick to let you pick up enough carbon to see the marks accurately. I managed by pressing really (really) hard. Afterwards thread tracing was fairly simple, I just had to set the tension to sew correctly through only one layer of the fabric. And this is about as far as I have gotten so far. I haven’t actually gotten around to assembling the muslin pieces. There is a reason for that though…

You guessed it, I have another lesson learned: mark notches! I forgot to mark every. single. notch. on every single pattern piece! How am I going to put the sleeves in? I’m not sure, I guess I will have to try to pin the pieces back to the fabric and add the notches in. That’s my plan for the upcoming week, mark the notches and assemble the muslin. Next up is Lesson 4 – Muslin 3: Fitting and Lesson 5 – Muslin 4: Finishing.

Fingers crossed I won’t have to do very much fitting!

Boyfriend Hat

hatflat

If there’s a set of interchangeable needles under the Christmas tree, you will have a hat when you come back from visiting your family.

Those are words that came out of my mouth. They were directed my boyfriend. Can you guess what was under the tree on Christmas morning? … It was most definitely a set of interchangeable knitting needles. Chiaogoo red lace, to be precise. I haven’t reviewed them yet because I’ve only made one project on them, with only one wool (this is that projet!). I don’t feel I’m in a position to evaluate these needles yet. That said, so far, I absolutely love them!

So technically, I did get him a hat by the time he got back from visiting his family. Unfortunately it was the worst pattern-yarn mix I have EVER made. I will be getting some pictures and most likely blogging about it, if only so that I can save one unsuspecting person from repeating the same mistake. The second try came out a lot better, and a heck of a lot later. 2 months later, to be exact. Thankfully the boyfriend is patient, kind and understanding (or he just really didn’t want to wear the first hat… I don’t blame him)!

But oh my goodness, what a joy this was to knit! I find cable patterns so compelling because you’re always motivated to finish the next round and watch it grow (much like colourwork). Combine that with the beautiful rustic wool: knitting was a dream.

The wool is from Briggs and Little woolen mills. A Canadian, family owned wool mill in New Brunswick. The boyfriend and I took a road trip out to the east coast of Canada last year. Unfortunately we didn’t visit the Briggs and Little mill, but we did visit the store! I was good and only purchased about $50 worth of wool (but only because we went to MacAuslands woolen mills where I spent way too much). The boyfriend picked out a skein of heritage in the colourway Grape so that I could make him a hat. Grape is a beautiful mix of purple, red, navy and teal. The way it looks depends a lot on the lighting, but it always looks beautiful to me. It is only my second favorite Briggs and Little colourway though… my favorite is Fundy Fog! The wool itself is very rustic, minimally processed. It is definitely not Merino wool, it is a workhorse wool that will stand up to a lot of wear. I’ve read that it’s a good (more economical) substitute for Brooklyn Tweed, but I’ve never held a skein of Brooklyn Tweed so I can’t comment on that!

hatonboyfriend

Although I really enjoyed the knitting process, I did have a few fit issues along the way. I forgot to increase needle sizes after the ribbing and that made the hat very small in circumference. I also measured carefully because I had to extend the cabling pattern since my row gauge was off. But still somehow the hat ended up being way too skinny and way too tall. Thankfully some aggressive blocking helped made it wider and shorter and I think it fits pretty well!

The boyfriend is happy.

The only problem is winter is over!


The Couture Dress

dresseries

I purchased the couture dress craftsy class by Susan Khalje almost a year ago now. But I wasn’t ready to make a dress, I watched most of the lessons, took some notes… slowly gathered my supplies. And now I think I’m finally ready to start!

I thought it might be interesting motivating to do a series of posts based on the construction of the dress, following along with the class. While I’m a big fan of seeing finished garments on blogs, I find I’m really drawn to post series where people are blogging the journey to a finished object. I’m not sure why that is, but I’m much more likely to snuggle up on the couch with a cup of tea and read a blog series following the progression of something (sewing, knitting, home decor, etc), than just browsing finished object posts. There’s just something about the ups and downs, tips, would do differently, would do again mixed in with little anecdotes that is just so compelling to me. I hope that someone out there is interested in this as well, worst case I will have a wonderful log for myself!

The couture dress class by Susan Khalje has 15 lessons (although one of them is an introduction). It comes with Vogue 8648 (the pattern actually gets mailed to you!! If you live in Canada you might understand why I’m excited about that). I elected to use the caroline dress by mouse house creations instead, I just don’t like V8648 that much, but I might try it in the future! I’m using thrifted hunter green cotton/acrylic blend fabric, my aim is to make a wearable muslin (I will be adapting the lessons as I go, since the class makes a separate muslin out of actual… muslin).

My current plan is to make one blog post per class lesson, at least. Unfortunately I haven’t even gotten around to the first lesson yet, since the first lesson involves marking your stitching line (as opposed to the typically marked cutting line). Then every single pattern piece has to be cut, traced onto the fabric, and then the tracings should be stitched over in thread…

So that is what you can expect in the next post!


Shu Uemura Eyelash Curler

curlerbox

Sometimes I feel like I could write a novel about eyelash curlers. I have had 3 different eyelash curlers and I’ve tried countless others. I think my problem is that my eyes are very large and very round. Most eyelash curlers leave a little bit out either at the inside or the outside, or both! On a whim I decided to purchase the (very) expensive shu uemura eyelash curler. I considered it a christmas present to myself.  (more…)

Salt & Pepper

cuff
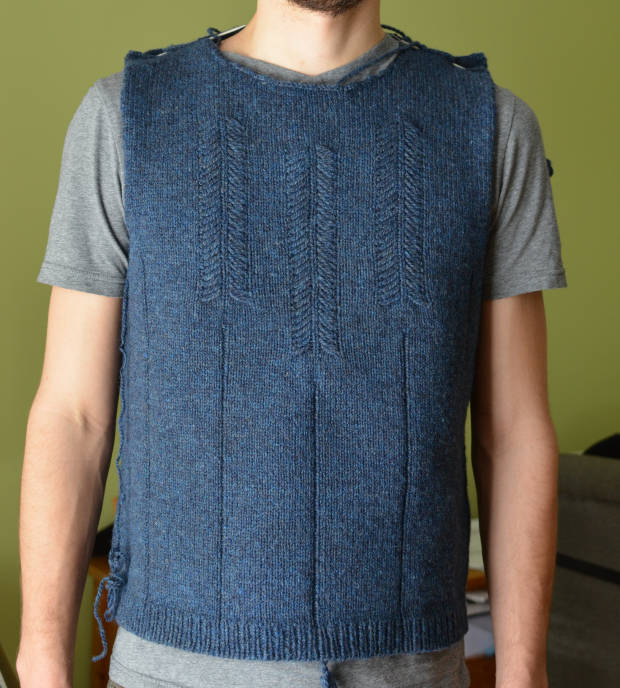
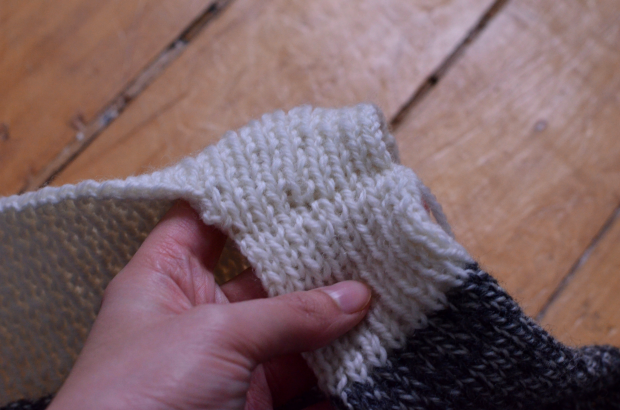
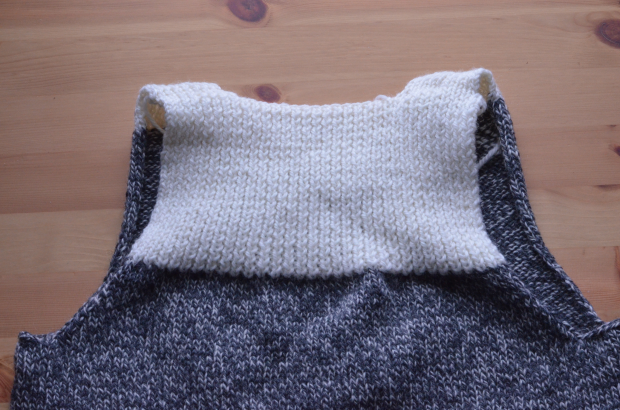
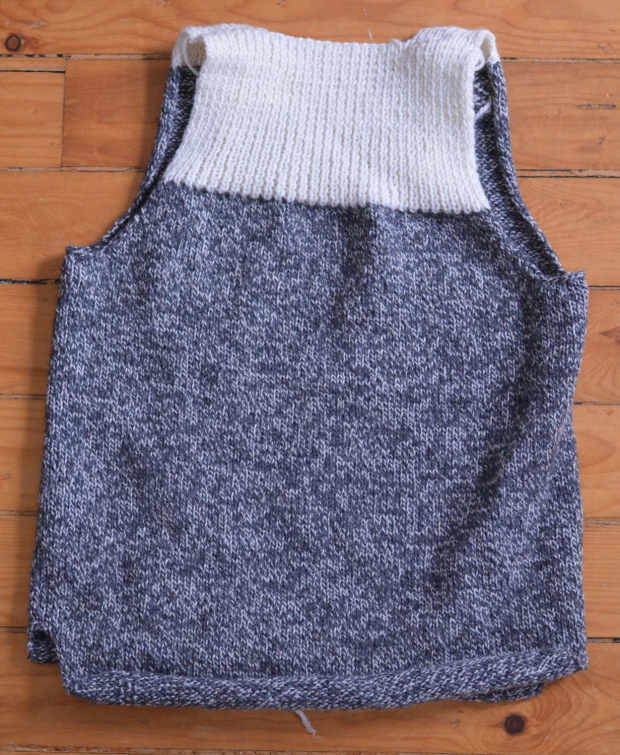
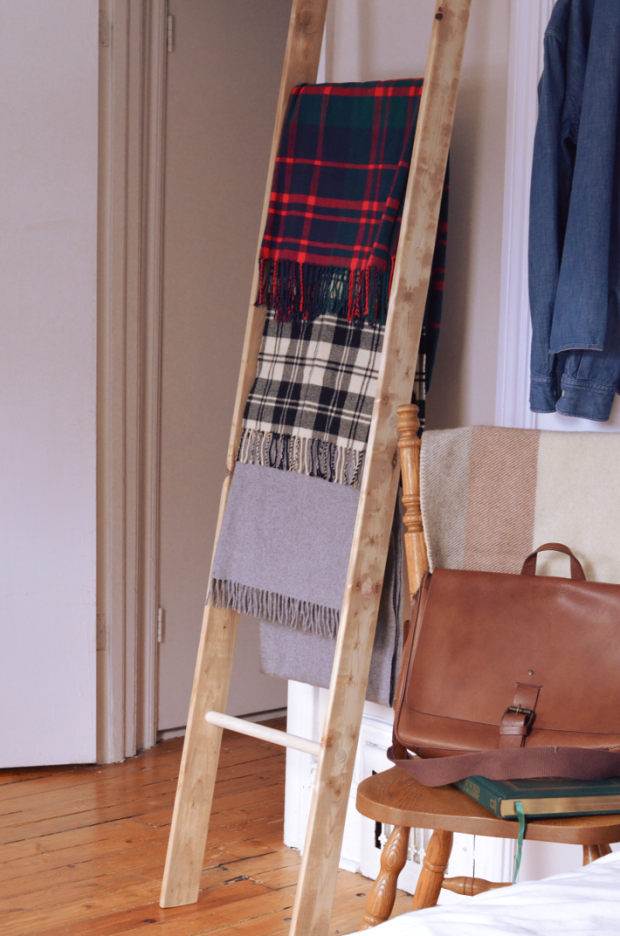
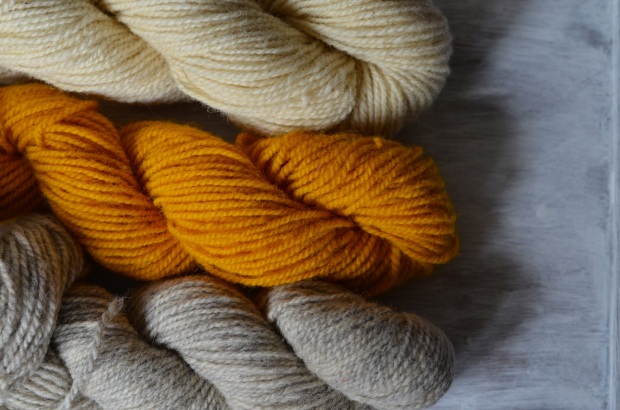
I discovered a few years ago that salt and pepper is the (un)official uniform of Canada. I don’t know how I never noticed it before, but after I did I saw it everywhere. And then one day (years later) it happened… I realized I really, really liked salt & pepper, and I needed it. [Taking a moment aside, I just realized I don’t even know if salt and pepper is a “colour” outside of Canada, I’m assuming that it is, but I’ve ever seen it referred to as marl on the internet.] Of course I could buy salt and pepper clothing, but it’s mostly found in the sweatshirts and sweatpants, and I wanted a little more sophistication. And I found it when the Tongshan Sweater pattern came out. The Tongshan Sweater is in my opinion a very timeless, versatile piece. I could see myself wearing it with jeans a riding boots, or over a dress or a skirt, in my mind it integrated so seamlessly into my wardrobe! So I purchased it and I got to work, last year.

And I’m not done.

But I’m going to show you where I am in the process. And it’s not perfect… While I love showing full outfit pictures of my finished projects, making them look their very best, making your own clothes is about a lot more than the end result. It’s about a lot of different things to different people, and it’s about a lot of different things to me, but today I’m sharing one aspect of it, which is learning. Whenever I make something new I always learn at least one (but usually many) things. To me this makes it all worth it. Even if I had to restart, things didn’t go as planned, and I’m not happy with the result, at least I can walk away knowing I learned something (and it’s okay if the only thing you learned is that it’s easier to frog or rip up seams with a glass of wine, or that it’s not a good idea to rip seams or knitting up past 1 AM)!

So why am I saying all of this? Probably because things did not go as planned with this sweater. I’ll just give you a list of things that happened and save you a few minutes of reading:

  • I worked the ribbing back and forth – really bringing out unevenness in my gauge
  • I knit each sleeve not once, but three times (!!!)
  • I modified the sleeve pattern because it was too tight, and didn’t take notes, I’m still not convinced my two sleeves are the same
  • I confused the front and back and had to rip back quite far
  • I couldn’t do the shoulder seams and my tenth attempt still looks horrible
shulderseam

Horrible Shoulder Seams

ribbing

Uneven Back Ribbing

And to top off the list, the sweater is currently blocking and based on the newest measurements, it looks like it will be about 3 inches too long. I would be lying if I said there weren’t any tears. But I learned a lot of things too, and I think that deserves a list as well:

  • I learned how to actually frog: taking the stitches of the needle and pulling back down to where you want to go and picking your work back up
  • I learned how to frog ribbing, increases and decreases
  • I learned how important accurate notes are, and to not assume I will understand something cryptic just because I’m the one who wrote it
  • I modified a sleeve pattern to fit my arm better, and I learned how I would improve my modification if I were to do it again

In a time where we are so used to seeing the very selected, highly edited version of everyone’s life and accomplishments, I love seeing peoples mistakes and how they have learned from them. Sometimes just knowing that other people have made mistakes, or that they consider their projects to be imperfect is nice.

fullview

Don’t worry, I’m still going to finish this sweater, and if it doesn’t make the cut to my wardrobe, at least I will have learned a lot.


A Lesson in Carpentry

dsc_0086

Just kidding, I’m not a carpenter and I don’t think I ever will be! Although I would like to build my own boat someday, and there is one lesson I learned that I can share… This post is about an idea that I had one day, at least I think it’s an idea I had. I made the mistake of googling my idea after I came up with it and found that it was a pretty common thing. Does that ever happen to you? You think you have a good, innovative idea, and it turns out it’s already been done? I like to tell myself that just means it really was a good idea.

My idea was to find an old ladder on which I could hang my (ever expanding) collection of blanket scarves. Blanket scarves are one trend I have really gotten behind. I personally don’t think there will ever be a trend as phenomenal as carrying a blanket with you everywhere you go (until someone invents comforter scarves, and then pillow scarves… and then memory foam scarves)!

Unfortunately I found out quickly that “antique” and “vintage” ladders were outside of my budget, which was about $30. So I decided to make one, with the help of the boyfriend, and the boyfriend’s roommates’ power tools!

And here she is, a “genuine” antique vintage ladder (because who knows if the ladders those antique shops sell really are antique anyways):

dsc_0073

Making the ladder was really simple, requiring only a bit of math and some patience! If I make another one I will write up a tutorial! It cost about $15 for the wood and $15 for the hole saw (an attachment that fits most drills). I used: a wood saw (to cut the boards and dowels down to size), an electric drill with a hole saw attachment (for the rung holes), a sander and a hammer!

I originally wanted to stain the ladder, but when I saw how the wood looked with only the sanding I changed my mind. The weathered effect was achieved by using treated outdoor wood and sanding it down. The treatment applied penetrates differently across the wood so when you sand down you are left with a patchy finish, which I really like because it makes me think of old weathered barns. A hole saw was used to make the holes along each side, the hole saw we used was the same diameter as the dowels, but it ended up being a very tight fit so we sanded the dowels down to make them fit into the holes.

For the curious, from top to bottom the scarves are: tartan scarf from Jcrew factory store, thrifted wool scarf, and aritzia’s gasperin scarf. There is also a MacAuslands woolen mills scarf on the chair to the right of the ladder.

I am so excited about this project that I want to make another one for my blankets!

And for all of you who would like to try this, here is my lesson: try to pick straight boards. If you start out with warped, bowed boards there is nothing you can do (ask me how I know!)


The Pleated Plaid Skirt

skirt1

A pleated (plaid?) skirt that hits just above the knee, some high heels and a merino wool sweater, everything a girl needs to be happy, right? I feel like I must be the only person in the world who does this, buy why oh why do I always choose a size too big? With the anya skirt, I at least reasoned with myself that the small waistband could have stretched, leaving me with a larger waist than the actual pattern. This waistband however is large and thick and sturdy, mostly due to the thick fabric (which is an unknown blend I thrifted). I have no excuse! I measured myself twice, and the skirt is too large!

This is McCalls 6706, a pattern so easy you almost don’t need a pattern! Except the pleats are on an angle to give the skirt more flare, so if you’re doing it without a pattern don’t forget to angle your pleats to give a nice fullness. I opted to just buy the pattern, I don’t know why, probably for the same reason that I purchased the anya skirt pattern, I just wanted to get right to work on the skirt without having to figure anything out! The pattern is very straightforward, the only tricky bit is making sure your pleats are neatly lined up. Which I just did an ‘okay’ job at.
skirt3

From the pictures my talented boyfriend took you really cannot tell the skirt is too big. The only thing you can see is that the sweater is bunched up but I don’t think you get a sense for how thick the sweater is bunched up under the waistband! It’s a loose fit, so all the extra wrinkles in the back helped keep the skirt up! I still love the skirt, and with a thicker sweater like this one it works okay, but it is not the fitted, tailored look that I was going for.

skirt2

All is not in vain however because I did learn a lot from doing this skirt, mostly about the importance of having proper markings. I had to go back once the side seams were sewn to try and mark up the pleats because my previous chalk markings had rubbed off (oops!). So next time I will mark the pleats with basting stitches. I will also add an invisible zipper next time because the bulky regular zipper prohibits the pleats in that area from meeting well (or perhaps I just executed it poorly?).

Turmeric: Part 2

dsc_0785

On the right is an un-dyed skein of yarn from the same “sheep-lot” (natural, un-dyed wool) and on the left is the result of dying half a skein with turmeric! I love to use turmeric on face, as you can see in this post! I have to thank the boyfriend for encouraging me to do this, as well as actually doing most of the work AND lending me his pots, stove and floor for yarn dying purposes!

Here is the process we used:

  1. We took half a skein of undyed wool and placed in it a number of pots until we found one where the skein comfortably fit with enough “mixing room” (if you want an even colour you don’t want the yarn to be tightly packed). We used this opportunity to note how much water was needed to comfortably cover the skein.
  2. We filled the (empty) pot with water and poured in some turmeric… boy did we pour in turmeric!
  3. We brought the mix to a simmer on the stove… and added more turmeric! I don’t really know anything about spice chemistry, but I know you can dissolve more salt/sugar when it’s warm so I added extra turmeric to be safe! It simmered for about 45 minutes.
  4. We placed the skein in the bowl and let it simmer on and off for a few hours, mixing regularly but carefully to avoid felting the yarn.
  5. We let the yarn sit in the cooling dye bath overnight.
  6. We rinsed, until the water ran clear.

And step number 6 is where we found out we used entirely too much turmeric. Eventually (after half an hour bent over the bathtub) the water ran clear, but when the skein dried it left turmeric dust everywhere it had touched, so we rinsed it again and again. Eventually (probably third rinse/dry cycle) the yarn stopped leaving turmeric traces everywhere. I will probably exercise caution when knitting this up in case it bleed onto other colours! And talking about other colours, here is my planned colour palette:

dsc_0788

Natural white, natural gray and a beautiful saturated turmeric gold! I can’t wait to knit something up!

Anya Circle Skirt

skirt4

This is the Anya Skirt. I made it to wear to a country wedding on what was possibly the hottest day of the summer (45 degrees with humidex, yikes!) I know it’s a bit silly to purchase a circle skirt pattern, but the pattern came with wonderful instructions which helped through every step of the construction, and I was very keen on inserting a zipper which went all the way to the top of the waistband. The fabric is an unknown blend that was on clearance at my local fabric store.

skirt2

The hardest part was attaching the zipper. Since I used my new (to me) singer 401, I didn’t have an invisible zipper foot. I nearly went crazy trying to install the zipper. The zipper kept curling into a C shape when I tried to iron the teeth (which you are supposed to do for invisible zippers). I finally went for a method that I think will work better than some of the tutorials I tried without success:

  1. I hand basted the zipper into place
  2. I ironed the teeth outwards: with the zipper basted into place the zipper didn’t curl on me
  3. I stitched as close to the teeth as possible, slowly

In the end my undoing was the waistband finishing: I sewed too close to the teeth and couldn’t pull the zipper up all the way. I ran out of time before the wedding so I sewed a hook and eye on the drive to the wedding! (Too bad the car ride wasn’t longer, I would’ve taken in the straps of the crop top as well!)

And surprisingly, the hem was really, really, really, truly, very easy! I followed a popular tip to sew 1/4” from the edge of the fabric, fold up along that edge, and fold up again. Then I stitched it down! That’s it!

I unfortunately didn’t get any pictures during the wedding day, it was so humid and hot that my camera lens fogged up immediately when I took it outside! Thankfully the couple’s photographer was able to get some beautiful photos for them despite the weather!

I have to say I will definitely be wearing a circle skirt to another wedding, it so much fun on the dance floor when spinning around! I even wore some matching hot pink shorts underneath for when the skirt flew up!

skirt1